Analytics are an important part of any website. You want to know how many visitors you have, what kind of visitors, what they are doing and how they got there. The great news is that Google offers a free solution in the form of Google Analytics. They also offer a newer solution, that can incorporate Google Analytics but also has the opportunity to measure a lot more. This is called Google Tag Manager. In this post, we will talk about installing Google Tag Manager on WordPress.
Google Tag Manager is a small set of code on your website that loads whenever a page is loaded. You can then use the Google interface to add other measurement mechanisms. The great thing about this is that you don’t need a developer every time that you want to add a new measurement. With these instructions, you don’t need a developer to add Google Tag Manager the first time either.
We are going to cover installing Google Tag Manager on WordPress, how you can do it and then we will tell you how to add Google Analytics to Google Tag Manager. We’ll also cover how to add other measurement codes to Google Tag Manager so you have a better idea of what it can do.
Google Tag Manager Containers
When you build a site, you often want to measure more than one thing. For example, you may want to include Google Analytics, a Facebook Pixel, perhaps a marketing campaign tracking code among many other things. In the past, you had to code each of these individually. This could be done through plugins or by hiring a developer but they all had to be added, configured, and tested on your website.
Google Tag Manager uses a concept called a container to manage this. Basically, a container is a collection of something called tags that have triggers to fire them and then they have variables. So, using Google Analytics as an example:
The page is loaded that triggers the Google Analytics tag. Inside the tag is a Google Analytics code that ties back to your site. However, you may not want to fire a tag on certain pages or under certain conditions. You might want a tag to fire when a user has completed a transaction such as purchasing something or completing a form. This can all be set up and Configured within Google Tag Manager without touching your site (once Google Tag Manager is set up on your site.
Installing Google Tag Manager on WordPress will let your site get the benefits of these analytics for better Search Engine Optimization (SEO), decision making, and profitability.
Tags
Tags are basically snippets of code. No, you don’t have to learn to code. Your partner (e.g. Google, Facebook, etc) will usually give you what you need. The tag then does some work, usually things like registering visits and visitor information.
You can use custom tags (custom code) but Google doesn’t recommend it. For performance, security and ensuring things stay working, Google would rather you use one of the many codes in the Google Tag Template Gallery. These are a wide collection of tags that have been vetted by Google and are expected to work with Google Tag Manager without causing you any issues. In general, if you need the tag, it’s there.
However, Google Tag Manager does allow a wide variety of options for custom tags if you need them. In this case, it’s best to get a Developer involved because this can get very technical, very quickly.
Triggers
You don’t necessarily want every tag to fire on every page. Perhaps you want to track logged-in users, or logged-out users, or people who bought things or landed on a certain landing page. You can configure Google Tag Manager to fire under certain conditions. If you combine these with creative elements on your site, you can get an almost infinite variety of triggers. This will let you ensure that tags fire under the conditions that you want them to. Here are some of the trigger options that you have for setting up a tag in Google Tag Manager.
- Page view triggers
- Click trigger
- Element visibility trigger
- Form submission trigger
- Scroll Depth trigger
- YouTube video trigger
- Custom event trigger
- History change trigger
- JavaScript error trigger
- Timer trigger
- Trigger group
Each tag can have its own trigger, which allows you to get very granular in what you want to track. For most sites, this isn’t necessary but in some circumstances, it can be very helpful.
Installing Google Tag Manager on WordPress
First, we need to create a Google Tag Manager account. Then we can take the code created there to paste the results on our website.
Adding Google Tag Manager
Total Time: 5 minutes
Go to Google Tag Manager
This will take you to the Google Page for Google Tag Manager. To access the Tag Manager you will need a Google account (or need to make one.)
Start Your Account

Click the Start for Free button. You will need to sign in with a Google Account, or create one there.
Click on Create an Account in the upper-righthand corner. This will open a new window

Create Your New Account
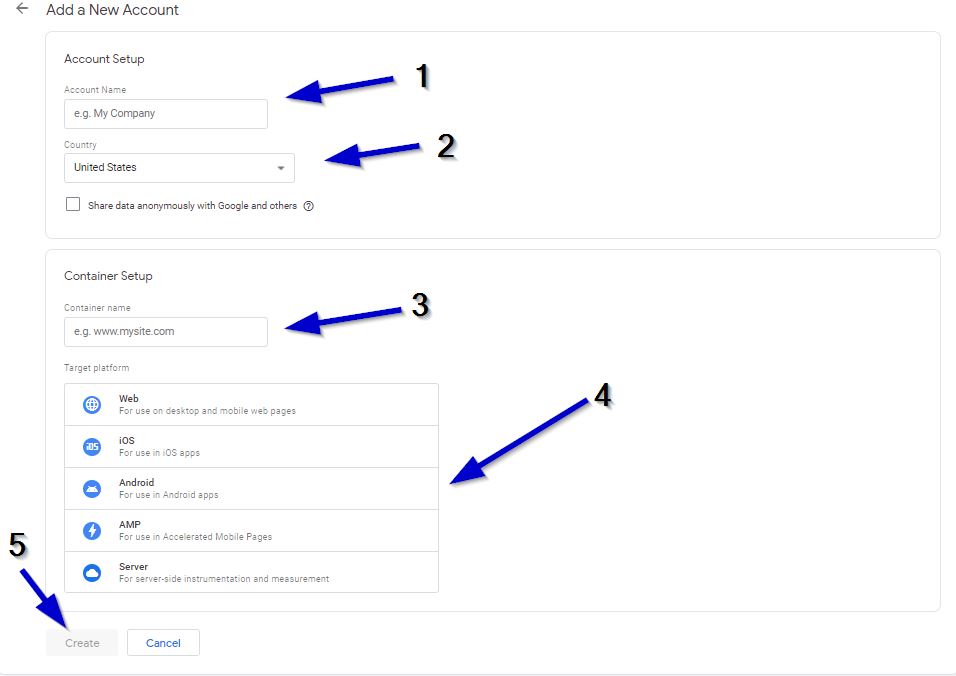
Now we’re going to fill in the form to create our new Google Tag Manager account.
1. Name your account. This should be something that you will remember and know that it’s associated with your site.
2. Select the country that you’re in. (Just below that there’s an option to share data with Google, that’s entirely up to you.)
3. Choose a name for your “container”. (e.g. www.yoursite.com)
4. Select the type of platform that you’re measuring. For most of our projects, this will be Web.
5. Click on Create
Accept Terms and Conditions

They will now ask you to read the terms of service and agree to them.
Copy the Code for Your WordPress Website
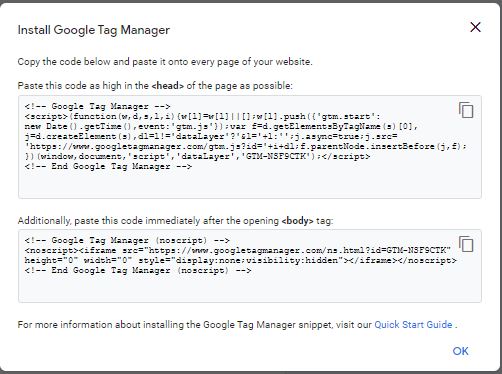
Now it will pop up a box with the code that you will need for your site. There are two of them, one for the HEAD of your site and the other for the BODY. Now you can go to your website.
Log into your WordPress site.
Go to your login screen. There are several ways that you can install the Google Tag Manager on a WordPress site. You can add them directly to the HEAD and BODY using your theme’s templates or in the functions.php file using WordPress hooks. We are going to show you an easy way to do it using a plugin.
Hover over Plugins on the left menu of the admin dashboard.
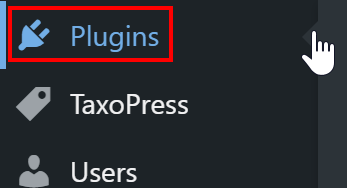
This will show another menu.
Select Add New on the menu
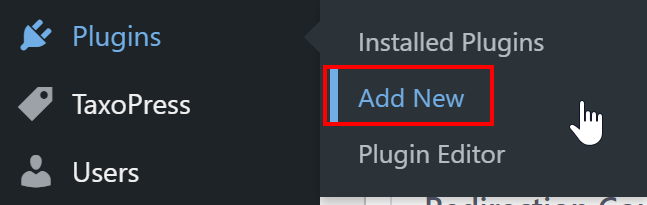
If you click on plugins, you will also find Add New at the top of the plug-ins page. They do the same thing.
Install Insert Headers and Footer by WPBeginner
Search for Insert Headers and Footers by WPBeginner (or download from this link)
Click Install Now
Click Activate
There are other options out there that do the same thing. We chose this one for its simplicity but the others likely will work fine. Some themes have options for this as well.
Under the Settings Menu (on the left) Select Insert Headers and Footers
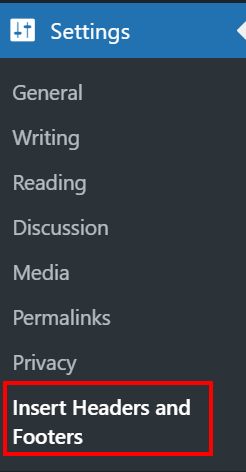
This will take you to the configuration page for Insert Headers and Footers.
Add the Google Tag Manager Code to Your WordPress Website
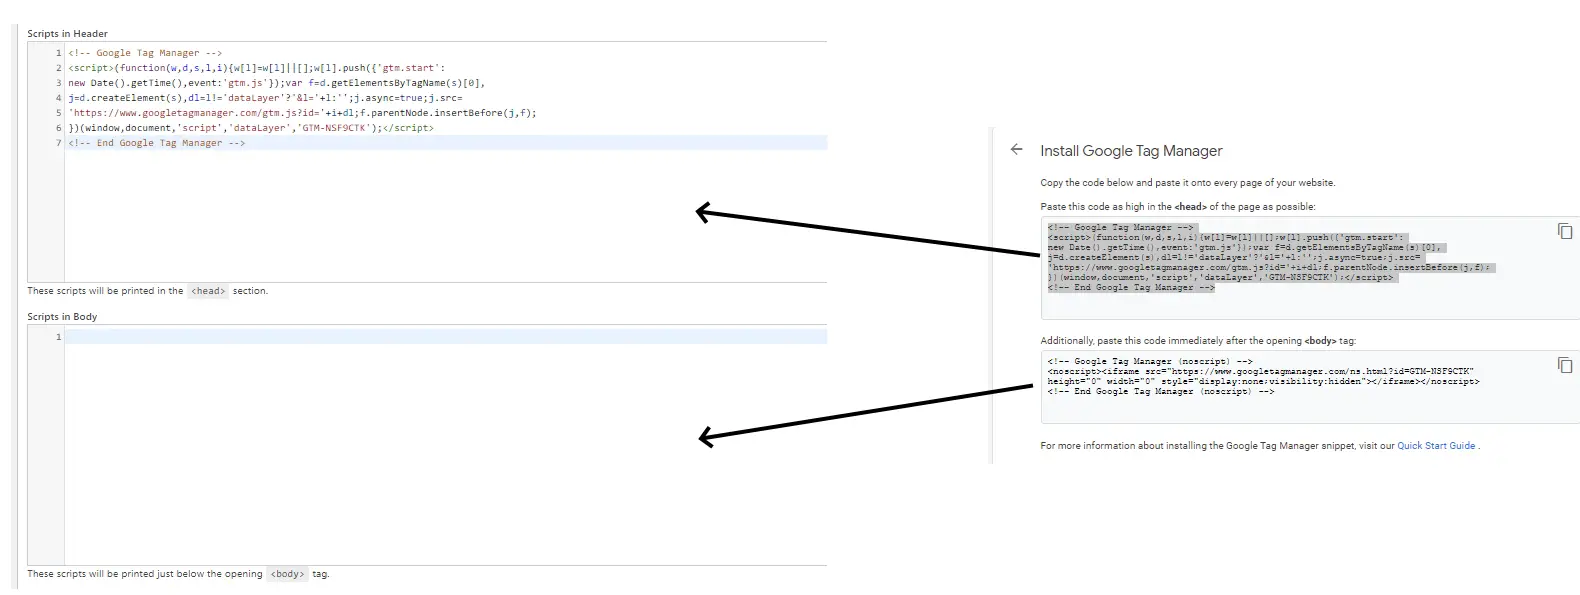
In the top box, labeled “Scripts in Header” paste the code from the first box of the Google Tag Manager. If you need to get it again in Google Tag Manager select Admin at the top and then Install Google Tag Manager. Paste the second piece of code in the “Scripts in Body” box.
Save the changes.
Confirm that the Google Tag Manager is Installed Correctly
- Install the Google Tag Assistant Chrome Extension
- Click on the icon in the extensions bar (or in the extensions dropdown menu)

- A new web page will open. Select Add Domain in the upper right hand corner and add the domain of your site.

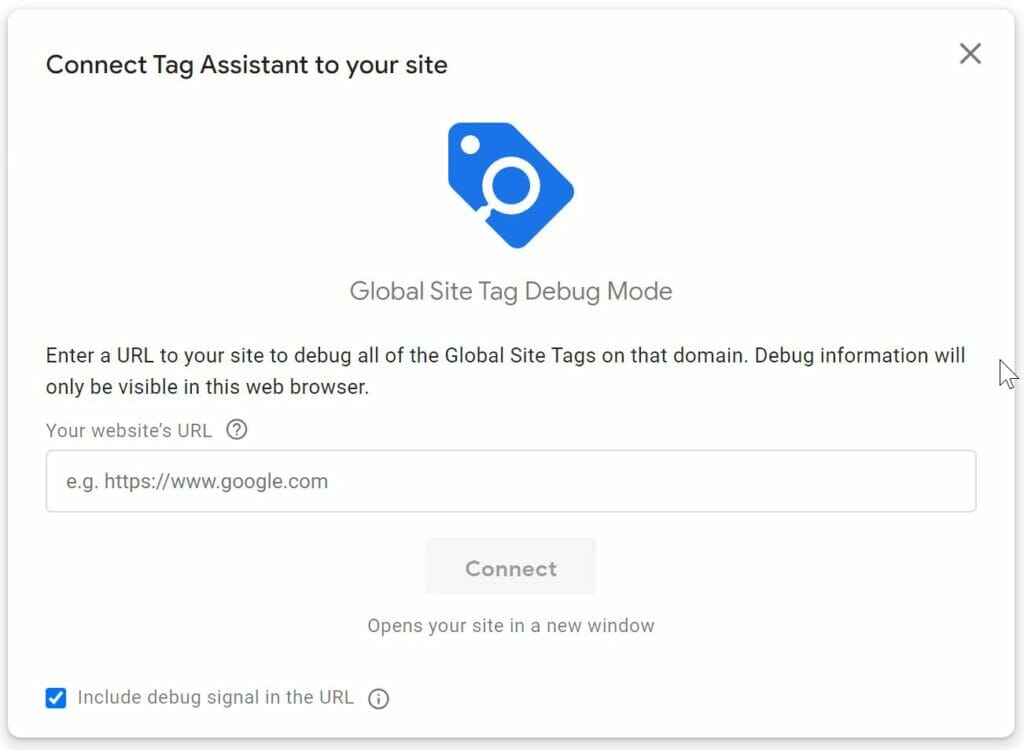
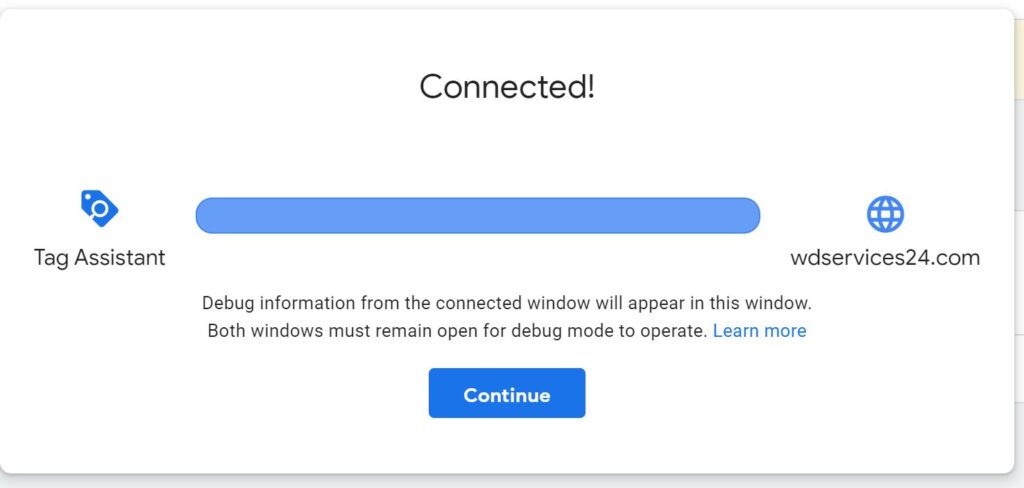
- Press Connect
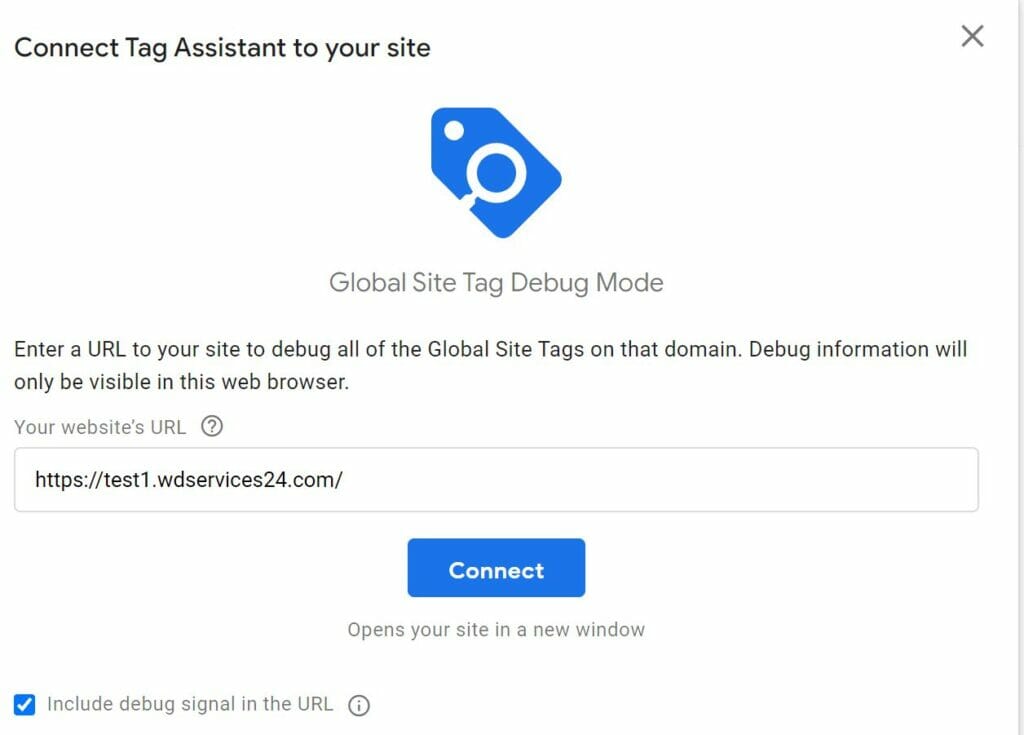
- A new screen will open with your website. The current screen will show the connection to your webpage.
- Go back to the original Google Tag Manager page. At the top, it should show the container value. (That will match the value that you pasted into the header).
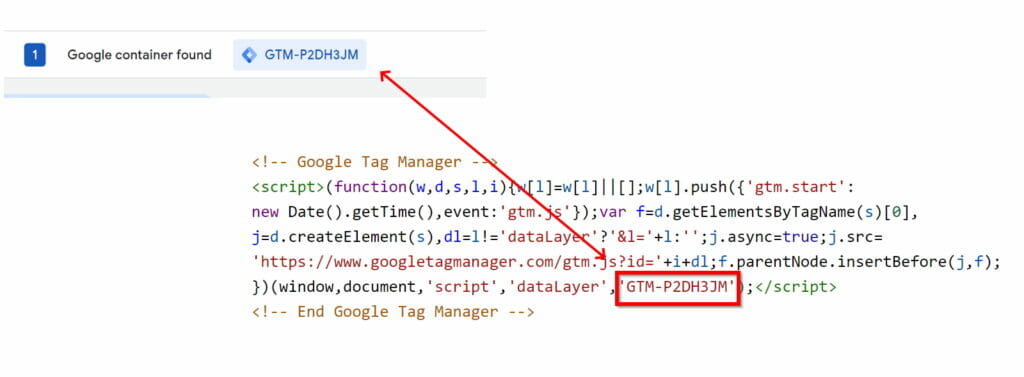
There you go. Your container is working. If the container isn’t there, then you need to go back through the steps and make sure the right code is in the header and body and that the tag manager is connecting.
Now that your container is working, we can start to add different tags inside of the container. Each tag allows us to measure different things. For example, here are a few things that you can add to a Google Tag container:
- Google Analytics
- Facebook Pixel
- LinkedIn Pixel
- Pinterest Tracking
- Custom Code
- Event Tracking
- Abandonment Tracking
- Much more…
All of these can be done without a developer having to add code or logic to your site. You can do it right from your Google Tag Manager. It’s powerful and flexible, which is great for someone who isn’t technical.